The actions on sites are an element of Real-Time Marketing in the iPresso system, i.e. marketing activities hosted/maintained in real-time in response to the current/ongoing activity of a potential customer.
To add a new action on the site, go to the Automation tab. Then in the left-hand menu select Actions on sites > Create new action.
The Settings tab will open by default after clicking on it - this is the first stage of creating actions on pages.
Configure the following elements:
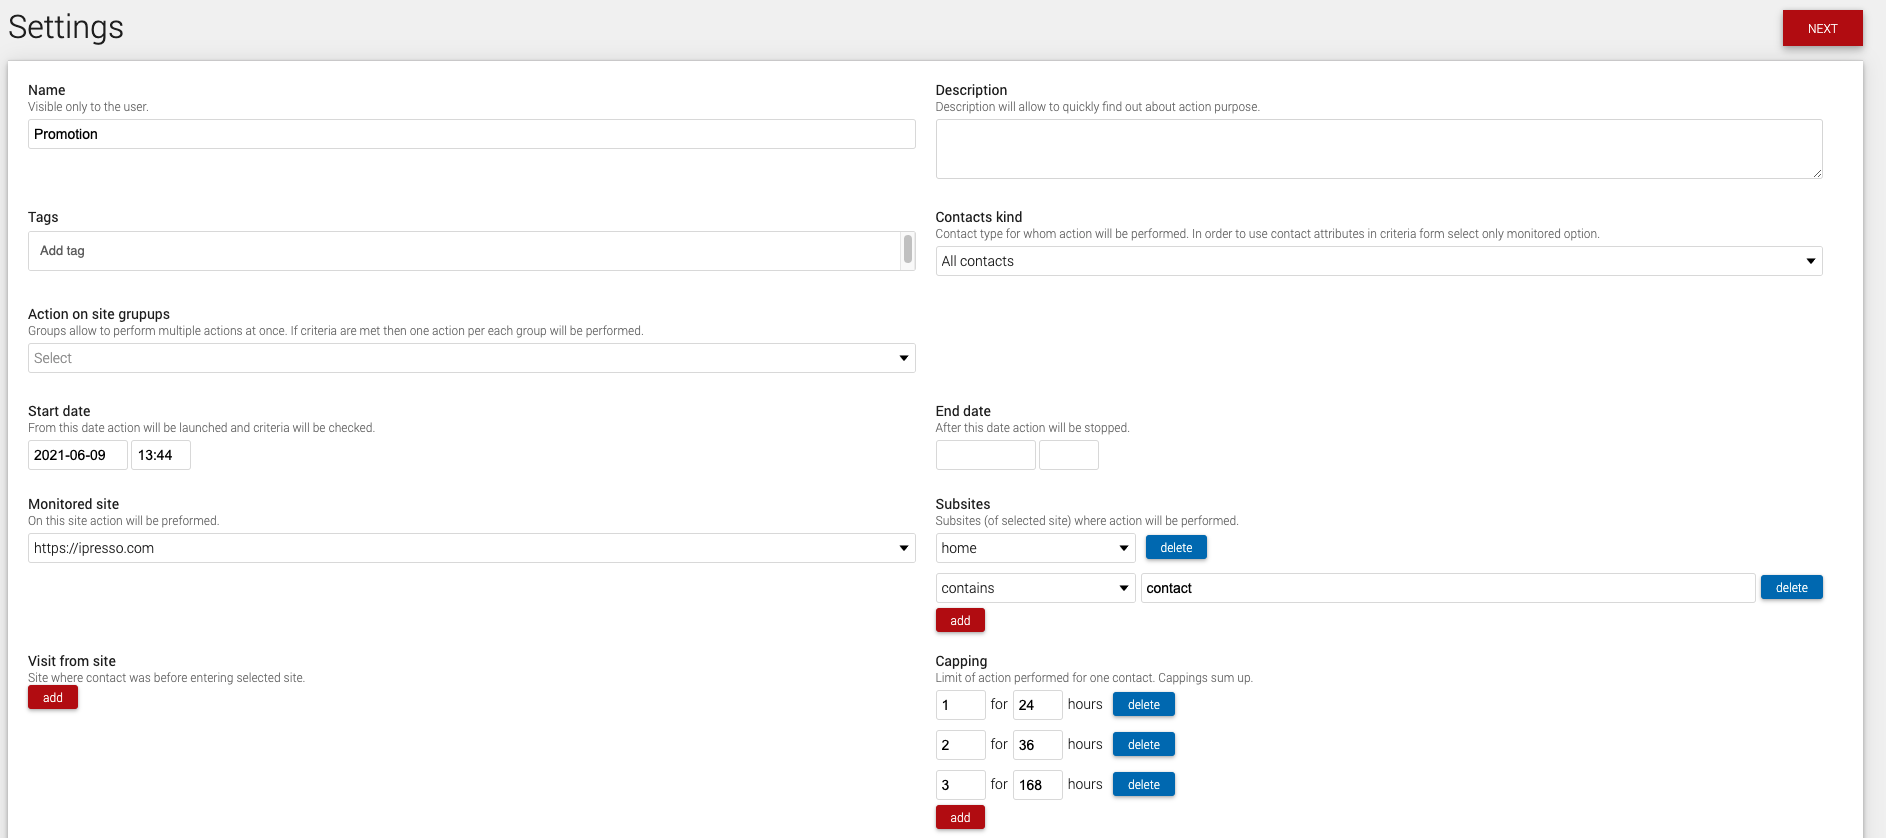
- Name - visible only to system users, allows later identification of the Action on site name
- Start date - the date from which the action will be launched and checking its conditions
- Contact type - types of contacts divided into all, “monitored only”, “anonymous only”, for which the action is to be triggered
- Action on site groups - more about this functionality you can read right here.
- Subpages - relate to the monitored sites that we have defined already in the previous step. Specify additional URL parameters where the action will be displayed. If you do not specify any subpages, the action will be displayed on the home page
- Visit from site - sites where there was contact before you went to the selected page
- Capping - limits the execution of action for a single contact. Remember that capping adds up
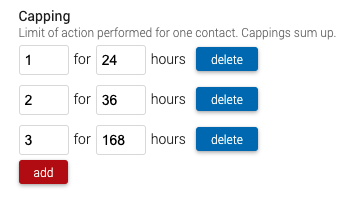
With these settings, the action will display no more than once every 24 hours, but also no more than twice every 36 hours and no more than three times per week.
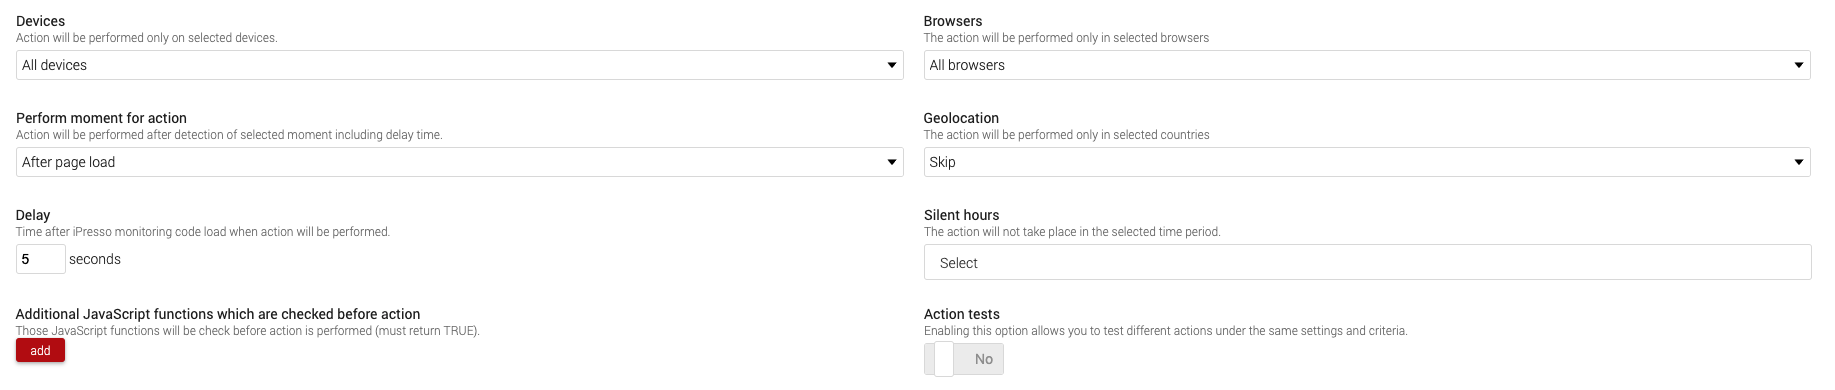
- Devices - allows you to specify whether the action should be triggered on every device or only on computers or mobile devices or within selected operating systems.
- Perform moment for action - the moment when the action displays to users: After page load, * After defined no movement time on site, On-page scroll, Before closing tab
- Delay - the time from the loading of the iPresso monitoring code after which the action will be triggered
- Silent hours - the silent hours setting is not mandatory. These stop the execution of an action at specific times. They must be defined earlier in System → campaign settings → Silent hours.
- Additional JavaScript functions which are checked before action - you can upload a file containing additional JS functions that will be checked before displaying a specific Action on site.
- Action tests - allow you to test different actions within the same settings and criteria. You can learn more about action tests here.
- Geolocation - you can use this/that setting to make action exclusive for a particular country or exclude a country from receivers
After filling the necessary fields in Settings, go to the Criterion tab.
Here you can specify the criteria used to display the action on the page. If you check the Activity order option, the system will check the criteria in the particular order to narrow the contacts to those taking exact steps one after another.

When selecting criteria for all contacts or anonymous contacts you have only Activities and Actions to choose from.
For monitored contacts, you can select criteria based on Activities, Actions, Attributes, Categories, Tags, and contacts' Consents.
After defining the criteria, go to the Action tab and select the type of action to be performed when meeting the criteria.
If you want to trigger a pop-up, send an email, SMS, or push - remember to prepare the creation in advance. Campaigns must be saved as triggered by API.
After choosing, go to the summary. If everything is configured correctly, all fields should be green or yellow. Then you can save your action by clicking the red save button at the bottom of your screen.
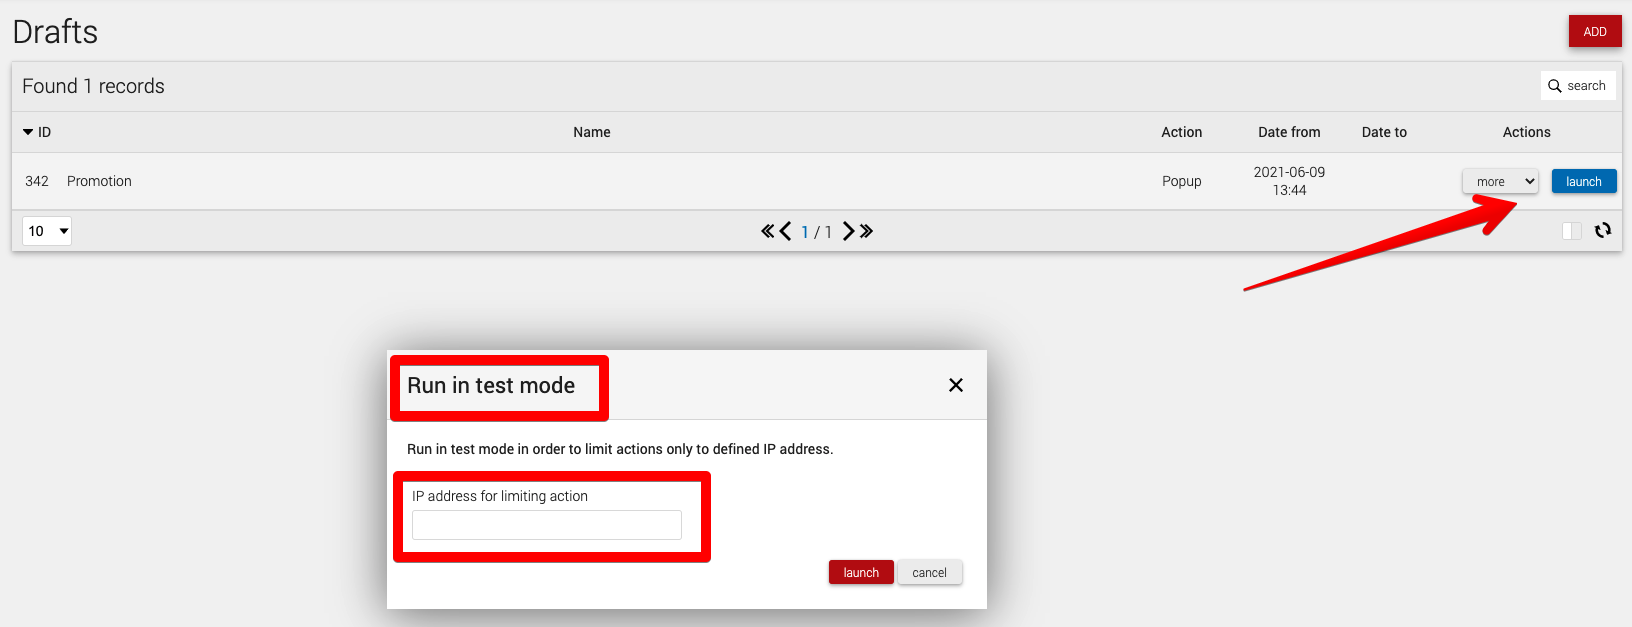
To make sure the action displays correctly, you can run it in test mode.
To do this, on the right, click:
More > Run in test mode > IP address for limiting action
The action will launch only for you, but remember - for it to execute, you also have to meet all the defined criteria and settings.
Comments
0 comments
Please sign in to leave a comment.